The Leadership

Leadership at Fromelles: Commanders and Consequences
The tragic Battle of Fromelles, fought over 19–20 July 1916, stands as one of the most disastrous engagements for Australian troops in World War I. Understanding the leadership decisions and command structures at play helps illuminate why the attack failed so catastrophically.
Commander-in-Chief: General Sir Douglas Haig
As Commander-in-Chief of the British Expeditionary Force, General Sir Douglas Haig ultimately held strategic responsibility for operations across the Western Front, including the ill-fated assault at Fromelles. While Haig did not directly order the attack, he delegated significant operational authority to his subordinate commanders.
Haig had been reluctant to shift forces from the Somme to assist the French at Verdun, and Fromelles became a diversionary effort to tie down German reserves. It was not his initiative, but he endorsed the plan devised by his lower command—a move that would later draw scrutiny.
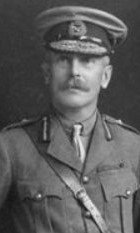
General Officer Commanding First Army: Sir Charles Monro
General Sir Charles Monro, GOC First British Army, had jurisdiction over the XI Corps, under which the Fromelles attack was launched. Monro was a cautious commander, often prioritising defensible positions over aggressive offensives. However, he did not intervene to prevent the battle, relying on his corps commander, Haking, to manage the engagement.
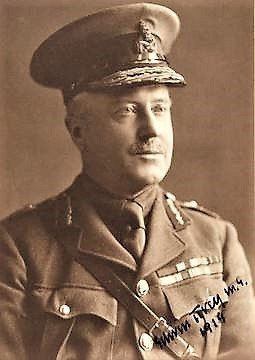
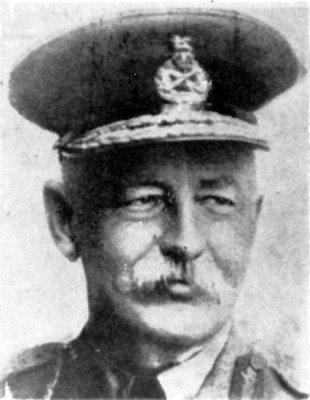
XI Corps: Lieutenant-General Sir Richard Haking
At the operational heart of the debacle was Lieutenant-General Sir Richard Haking, commander of the British XI Corps. Haking had a reputation for being overly optimistic and somewhat dismissive of the risks to his troops. He was the architect of the Fromelles assault and pushed it forward despite warnings.
He believed the attack would serve as a valuable learning experience for the Australians and that it might draw German attention away from the Somme. Haking infamously stated:
“The only way to learn is by fighting... if the attack had not been made, the 5th Australian Division would not have been able to take part in any operations for a month owing to congestion in the back area.”
— Lieutenant-General Richard Haking, post-battle report, 1916
His confidence came at a terrible cost. The Australian 5th Division suffered over 5,500 casualties in less than 24 hours.
II ANZAC Corps: Lieutenant-General Sir Alexander Godley
Though not directly in command of the Fromelles offensive, General Sir Alexander Godley, leader of II ANZAC Corps, oversaw coordination of New Zealand and Australian divisions on the Western Front. His role was tangential during Fromelles, as the 5th Division reported directly to the British XI Corps rather than through ANZAC channels—one of the structural flaws contributing to confusion and inefficiency.
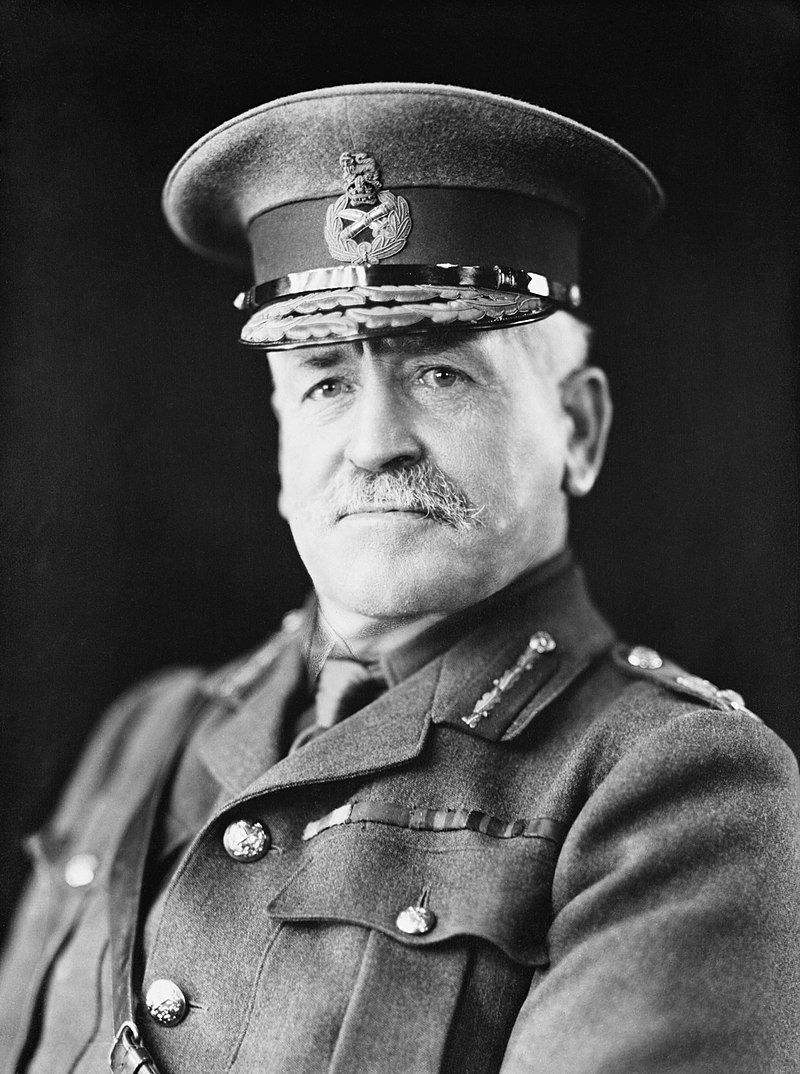
5th Australian Division: Major General James Whiteside McCay
Major General James McCay, commander of the newly arrived 5th Australian Division, carried out the orders under Haking. McCay had previously been a politician and was viewed by many of his men with suspicion. He was accused of being inflexible and was later criticised for his handling of the assault.
Troops under McCay's command expressed bitterness over what they saw as poor planning and a disregard for their lives. Lieutenant Charles Bean, Australia’s official war correspondent and historian, wrote bluntly:
“The attack was a complete and costly failure... the 5th Division lost heavily, and no ground was gained.”
— C.E.W. Bean, Official History of Australia in the War of 1914–1918
8th Brigade: Brigadier General Edwin Tivey
The 8th Brigade, consisting of the 29th, 30th, 31st, and 32nd Battalions, was led by Brigadier General Edwin Tivey. A Boer War veteran and professional soldier, Tivey followed orders to support the main attack. His brigade was responsible for the extreme left flank of the assault and suffered some of the heaviest losses—particularly the 32nd Battalion, which was nearly destroyed.
Though Tivey’s personal conduct during the battle is not extensively documented, his brigade’s position—exposed to fire from both front and side—left them vulnerable, and the resulting deaths created enduring trauma in Australian memory.
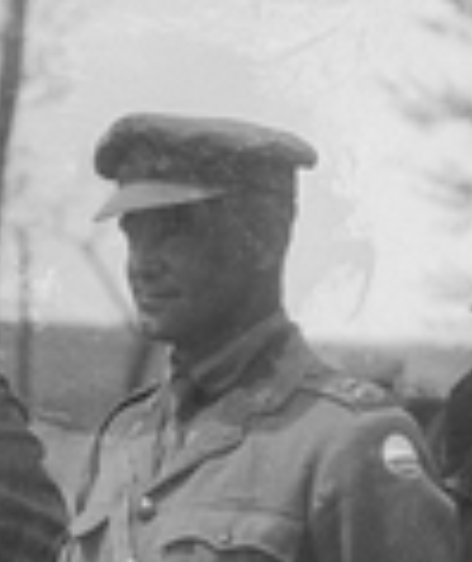
14th Brigade: Brigadier General Harold Pope
The 14th Brigade under Brigadier General Harold Pope included the 53rd, 54th, 55th, and 56th Battalions. Pope had only recently taken command, and his inexperience at that scale of warfare was a factor. His brigade advanced on the centre-left, facing well-entrenched German positions.
Pope’s troops suffered dreadfully. The 53rd Battalion, for instance, had 625 casualties alone from the battle. The loss devastated entire communities in New South Wales. While Pope was not directly blamed, he was relieved of command shortly after Fromelles.
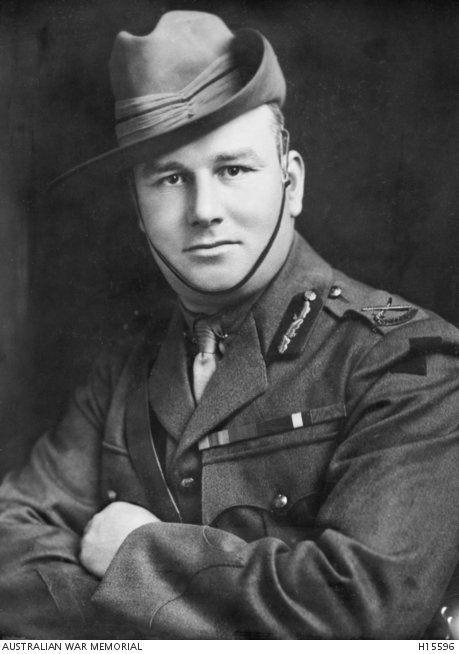
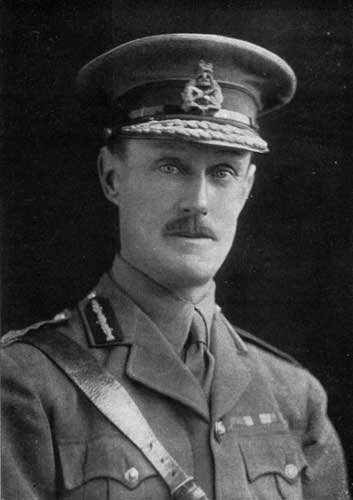
15th Brigade: Brigadier General Harold "Pompey" Elliott
Brigadier General Harold Edward "Pompey" Elliott, commanding the 15th Brigade (comprising the 57th, 58th, 59th and 60th Battalions), is often remembered with respect for his fierce loyalty to his men. Unlike many of his peers, Elliott had strong reservations about the attack.
According to war diaries and Elliott’s own letters, he protested the lack of preparation and intelligence but was overruled. His premonitions tragically proved true.
After the battle, Elliott broke down in tears upon seeing the bodies of his men. Elliott carried the trauma of Fromelles for the rest of his life. He remained a strong advocate for veterans and later entered politics but died in 1931—many believe haunted by the memory of Fromelles.
The Legacy of Leadership at Fromelles
The Battle of Fromelles has come to symbolise the devastating consequences of poor leadership, overconfidence, and underestimation of the enemy. While some commanders, like Elliott, emerged with their reputations enhanced due to their care for their men, others—especially Haking—were widely criticised, both then and now.
No ground was gained, yet more than 1,900 Australians died. Over 1,200 had no known grave, many lying for decades in unmarked fields until the discovery of the Pheasant Wood mass grave nearly a century later.
Understanding the chain of command, the decisions made, and the failures of leadership provides vital context for remembering the soldiers who fought and died under their command.